SAML with WSO2
Based on your application type, refer to the appropriate sections for SAML with WSO2 configuration:
Once SAML configuration is ready, you can add user groups to erwin Mart Portal
Before you configure SAML with Okta, ensure that you have responded to the questionnaire from your Quest Support representative so that they can provide you with the Reply URL for your instance. If you did not receive the questionnaire, reach out to your Quest Support representative.
To configure WSO2 SAML for erwin Mart Portal on-cloud authentication, follow these steps:
-
Download WSO2 Identity Server here.
-
Extract the installer and open the extracted folder.
-
Run command prompt and run the
wso2server.batcommand.Ensure that the path for the JAVA_HOME environment variable is configured.
-
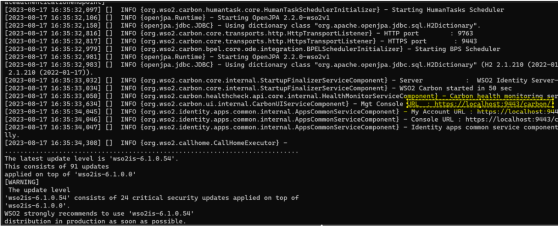
Copy the Mgt Console URL, highlighted in the following image.
-
Open the URL in a web browser and log in using the following credentials:
-
username: admin
-
password: admin
-
-
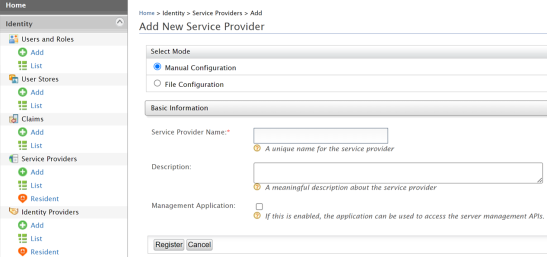
Under Service Providers, click Add.
-
Enter an appropriate Service Provider Name and click Register.
-
Enter your Reply URL provided by Quest Support.
-
Expand Claim Configuration and click Use Local Claim Dialect.
-
Click Add Claim and add email address and groups.
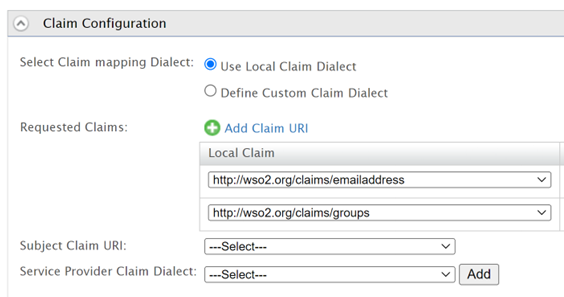
Similarly, you can add a display name here.
-
Under Inbound Authentication Configuration, click SAML2 Web SSO Configuration > Configure.
-
Configure properties as shown in the following image.
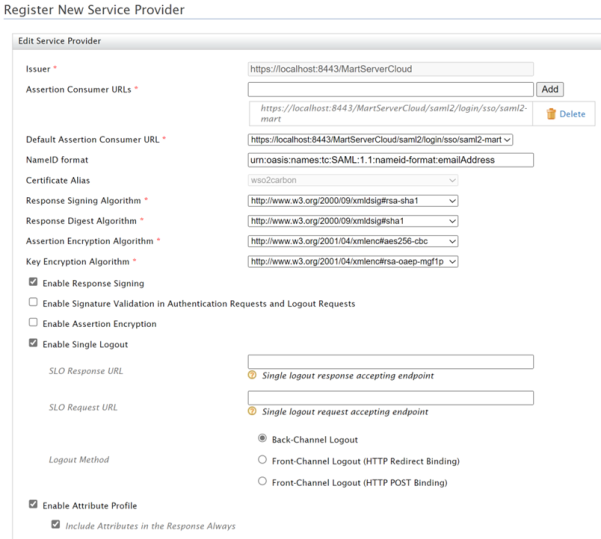
-
Click Download IDP Metadata.
-
Click Register.
-
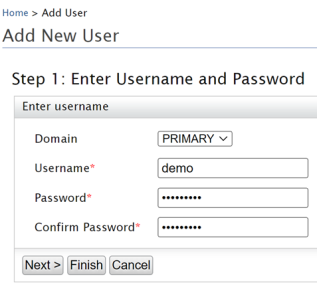
Under Users and Roles, click Add > Add New User. Then, enter the necessary information.
-
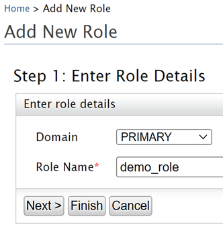
Under Users and Roles, click Add > Add New Role. Then, enter the necessary information.
-
Click Finish.

-
For the required role, click Assign Users.
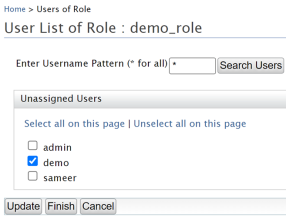
- Click Finish.
-
Share the following details with the Mart Cloud Support team:
-
IDP Metadata File
-
Group Attribute Name
-
User Email Attribute Name
-
User Display Name Attribute Name
-
Once the support team authenticates erwin Mart Portal for you, you can move to adding groups in erwin Mart Portal at https://<your_instance>.myerwin.com/MartPortal.
To configure WSO2 SAML for erwin Mart Portal on-premises authentication, follow these steps:
-
Download WSO2 Identity Server here.
-
Extract the installer and open the extracted folder.
-
Run command prompt and run the
wso2server.batcommand.Ensure that the path for the JAVA_HOME environment variable is configured.
-
Copy the Mgt Console URL, highlighted in the following image.
-
Open the URL in a web browser and log in using the following credentials:
-
username: admin
-
password: admin
-
-
Under Service Providers, click Add.
-
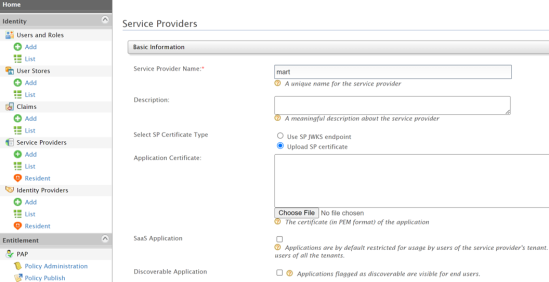
Enter an appropriate Service Provider Name and click Register.
-
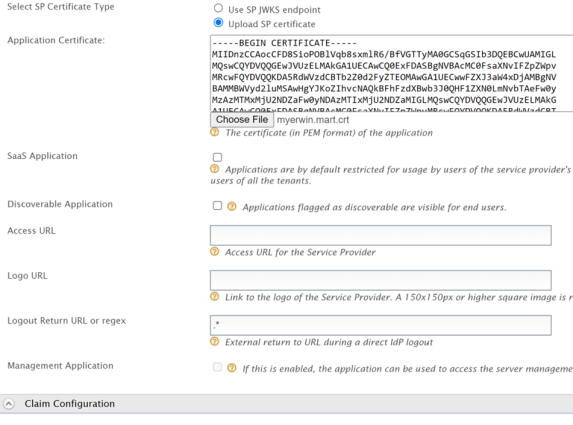
Click Upload SP certificate and upload the myerwin.mart.crt file available at C:\Program Files\erwin\Mart Portal\Apache\.
-
Expand Claim Configuration and click Use Local Claim Dialect.
-
Click Add Claim and add email address and groups.
Similarly, you can add a display name here.
-
Under Inbound Authentication Configuration, click SAML2 Web SSO Configuration > Configure.
-
Configure properties as shown in the following image.
-
Click Download IDP Metadata.
-
Click Register.
-
Under Users and Roles, click Add > Add New User. Then, enter the necessary information.
-
Under Users and Roles, click Add > Add New Role. Then, enter the necessary information.
-
Click Finish.
-
For the required role, click Assign Users.
- Click Finish.
-
On the erwin Mart Portal configuration screen, click the Authentication tab, and then follow these steps:
-
In the Metadata XML field, select File, and then add the IDP metadata file downloaded in step 13.
-
In the Group Attribute Name, User Email Attribute Name, and User Display Name Attribute Name fields, enter the values that are configured in step 10.

The User Email Attribute Name and User Display Name Attribute Name fields are optional.
-
-
Click Configure.
Your erwin Mart Portal is now authenticated via WSO2.
Adding Groups in erwin Mart Portal
To add your WSO2 SAML groups to erwin Mart Portal, follow these steps:
-
Create a CSV file containing the <group_attribute_value> and <group_display_name>.
You can also use the sample template for groups and replace the sample values with the actual Group Attribute Name and Group Display Name.

-
Log in to the erwin Mart Portal as an administrator.
-
Go to Application Menu > Users.
The Users page appears.
-
Click Add User.
The Add User page appears.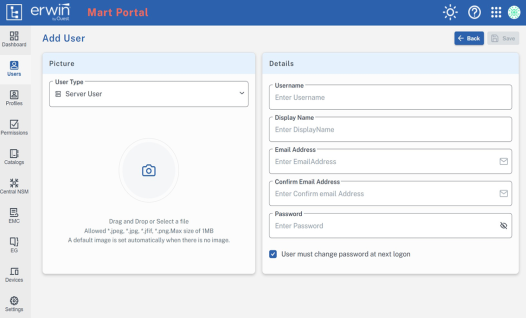
-
Under User Type, select SAML Group
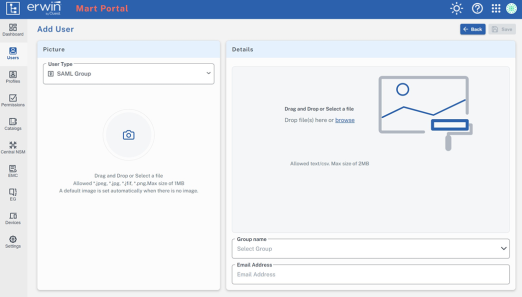
-
Drag and drop the CSV file that you created in step 1.
-
Under Group name, select the required group.
-
In the Email Address field, enter your email address.
-
Click Save.
The group has been added.